Deb Ward, GWS, OWS, PWS, WSI - WATERCOLOR/WATER MEDIA - My passion is teaching adult “beginners”. Weekly classes in my home; workshops; classes for Cincinnati Recreation Commission. My work is nationally recognized and published - see “Featured” on my sidebar. I’m a Signature Member of Georgia, Ohio, Pennsylvania and Indiana state Watercolor Societies, Cincinnati Art Club, past-President of Greater Cincinnati Watercolor Society. Contact info below under “Class Information”

Showing posts with label instruction. Show all posts

Tuesday, November 19, 2013

STILL LIFE WITH STRAINER - 1

When I went to the AWS show last summer there was a beautiful Sue Archer painting of a silver object with grapes and apples.  When I showed it to my students they “oohed and ahhed”.  When I told them they could paint that painting they all said “NOOOOOOO”.  So, to prove them wrong, I made a class project a similar painting.

I had discarded my stainless colander (what was I thinking, it would have been perfect for set ups) but had a stainless strainer basket.  I used that for the silver object, added grapes and tomatoes since we had already painted apples.  If the tomatoes look a bit small – they are the Compari vine grown tomatoes which are smaller than regular tomatoes, and the grapes were those big, juicy ones!  Anyway, I also decided to add a tiny bit of lace to the mix.

Here is the Sue Archer painting this painting is based on:


Here is the set up photo that we used for the painting.


Sunday, March 4, 2012

FEATURED ARTIST!

I’m happy to let you know that I’m featured on Carrie Waller’s blog “Carrie’s Creations”.  So hop on over there to see my interview!

Carrie had a lot of great questions that made me think before I answered, but if I were filling out the interview today, some of those answers would be different. I don’t always do the same thing. Even as I reread my answers on her blog I realized that I’m not painting exactly that same way right now. But I might on my next painting!

Art – there really is no “cut and dried” right answer!

We can probably all agree that our art evolves constantly. Hopefully we are all making a progression to better pieces in the future, with that elusive “best” piece always our goal.

Thanks to Carrie for inviting me to participate in her Friday Feature Artist!

And - be sure to check out her "guest blogger" - my good friend Rhonda Carpenter!  Check out Rhonda's blog too!

Happy painting!

Thursday, April 28, 2011

IRIS - FINAL

I puttered with the flowers and buds and sharpened them a bit.
Then a loose, washy background and the painting was completed.

Monday, April 25, 2011

IRIS - 1

This was a demo painting for a class. As you can see, I began with the main iris stem crossing another, and then decided I didn’t like it.

I completed the iris, and then redrew the stem going more straight down.

Sunday, January 16, 2011

SYCAMORE LEAVES - 2

I gradually – s l o w l y !! – work up the colors on each leaf. At this point I’m wondering if I need something else in the right open space, but think I’ll wait until the painting is farther along to decide.

Wednesday, January 12, 2011

SYCAMORE LEAVES

Finally, I’m back with a painting!

This painting was started as a demo, some time ago, for a fluid acrylic workshop.

When I do a demo, I don’t usually think of trying to get a completed painting. I just take an object or scene that I can use as an example in order to teach the class the specific technique or concept. If the painting works out, it’s a bonus! 

Since I was doing  more than one demo that weekend, this painting was started to simply show how I glaze with fluid acrylics.

The sun was backlighting some sycamore leaves one afternoon so I took a photo. There were more leaves in the photo, but I liked this diagonal line, so I left out several leaves. As usual, I began by glazing on some color.

Thursday, June 17, 2010

RETURN FROM THE RETREAT!

I’m b-a-a-a-a-a-c-k! Didja miss me??

While at my painting retreat I somehow managed to ruin one of my starts.  I can hear you all saying to yourself "wow, imagine that; that NEVER happens to me!!!"  What began as a cheerful and light painting suddenly, and without warning, turned into some sort of muddy, greyed down, purple-y sort of disaster - the poster child for what not to do to a painting!
But I did manage to get some of my other starts finished and begin another picture, so the next couple of posts will be showing you those.

First up is a flag painting started in April!  (Speed kills!)
 
The picture on the right is how it looked when I took it to Tennessee - the next post will be the completed painting.  "Gotta make ya wate ah wile!!!!" as they say in the mountains!
In the meantime, someone asked about the “Painting” game that I took to our retreat. I created it some years ago and loosely based it on a popular children's board game. For the cards I worked in some silly ideas relating to painting; then collaged some pictures from catalogs and art magazines onto the board; bought some chess pieces and painted them and there you have it! I also created a travel version of the game using magnets – but that didn’t get heavy use since there is usually too much talking going on during the drive to and from! This year I created a “new and improved” version which was played with much vigor, laughter, choking, tears (of laughter!) with a small percentage of wine involved!  Another fun-filled week of art, food and friends!

Sunday, May 9, 2010

YELLOW LILIES - FINALLY!

Here are the lilies – FINALLY!  They are finished as far as I’m concerned.
I did a value study (forgot to photo it, but I did really follow it for the violets).
Then I added darks in the rest of the centers, and added a violet for my darker areas as indicated in the value study, then let some of the violet run off the edges.

Saturday, May 1, 2010

QUILT AND ROSES

NOTE: I realize that I’m jumping all over lately showing what I’m working on, but I’ve got a lot of starts that need to be finished, so I’m posting as I work on them – not very cohesive blogging!!! (sorry).
And I may be a bit terse in my replies, but I really do care about all of you who stop by here – just have a lot going on lately but still want to stay connected.

Talk about "speed kills" - you can see how slowly I'm getting my paintings finished lately!!!
This was another start from my fluid acrylics workshop at Cincinnati Art Club in February, and this one may be a keeper! I think it shows the softness of the folds of cloth and I made the roses red for my husband!

Red Roses on Grandma’s Quilt, Fluid Acrylic on 300# Arches

I also taught this painting at my recent weekend workshop, in case it looks a little familiar! 

Thursday, April 29, 2010

CAT TAILS

I added some more greens to the reeds and more golds in the open pod.
These are finished – at least as far as I’m concerned. Not one of my better paintings, but it made a good demo!

Wednesday, April 14, 2010

YELLOW LILIES - PART 3


More done on the lilies – still need more darks and haven’t decided how I will handle that because – duh – no value study. So, to the drawing board to figure this out now – better late than never!

Thursday, April 8, 2010

YELLOW LILIES - PART 2

Once the drawing on the tracing paper was complete I made some adjustments and when I was happy with the final changes, I put Saral transfer paper under the drawing and traced it onto the painting - here you can see the graphite lines.

Even though the lines are now drawn onto the watercolor paper, I will still make small changes as I begin to paint.

In starting the painting I decided to paint more on the lilies themselves rather than the background. At this point, I’m not so sure that was the best idea!

Monday, April 5, 2010

YELLOW LILIES - PART 1

Here is the start of some yellow lilies photographed in Chicago a couple of years ago, and I’m finally getting around to using them in a painting!
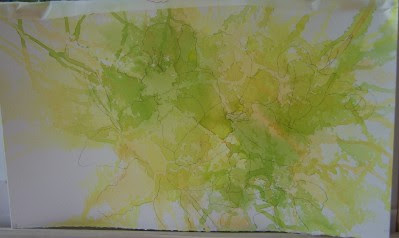
First I poured some misket – since I used Winsor & Newton colorless it is pretty impossible to see.  Then I poured some yellow and green DaVinci fluid acrylics.
The next step was to tape some tracing paper over the painting and attempt to find lily shapes in the poured paint.
To the best of my ability, and using my photo as a reference only, I found shapes that represented lily petals in the shapes in the paint and drew those shapes onto the tracing paper.
I think this is the thing about this technique that confuses people. Due to the abstract nature of the pours, it is hard to define exactly where the painted shapes will end up. You can trace the drawing first and then attempt to pour the miskit and paint within the parameters of the drawing, but it is probably better to try to make your drawing fit the pours, and use your photo as a reference for a jumping off point only.

So, while the painting will look somewhat like the photo, it is not a direct copy of the photo.

Monday, March 29, 2010

CATTAILS

You can see the start of the cattails at the fluid acrylic workshop. This is on canvas and it’s not photographing very well – you can see too much canvas texture, but it’s the best I can do.
I began by taping off top of the cattail; then pouring some paint and letting it drip across the canvas, right over the reeds. In retrospect, I probably should have misketed them, since now I have to go darker to cover the water marks.
Anyway, I was happy with the water-y result in the background.
I then began painting in the cattail “puff”.

Tuesday, March 2, 2010

FLUID ACRYLICS WORKSHOP - CINCINNATI ART CLUB

Finally, we were able to have the fluid acrylics workshop! You may recall that it had been scheduled for first weekend in February but we got snowed out with one of many snow storms. So, with snow in the forecast AGAIN, the workshop facilitator and I had been back and forth on the phone Friday coordinating all possibilities for the weekend.
On Saturday I woke up to my husband telling me that it had snowed during the night. (Insert your own expletive here!!!) But, turned out it was just a “light dusting” so, after one more call to check the weather report in Cincinnati, off I went – loaded for bear!!! (And, just for more winter fun – I awoke Sunday to ice on the roads here in the country – which, fortunately, turned into “just wet” the further I drove into the city. As the forecasters would say – “we dodged a bullet”).
The two days went quickly for me, and I had a ball! I already knew 2 of the participants, and others in the group knew each other, so we all quickly became a congenial group. We laughed, we learned, we ate Panera Bread bagels with cream cheese - and we even did some painting!
There were both oil and watercolor painters in the group and they were all very curious about the fluid acrylics. By Sunday afternoon they had learned several techniques to incorporate into their paintings.
All in all, a very pleasant way to spend a weekend – art, food, fun and friends!
If you are interested in an unbiased opinion (!!!) about the workshop, Gaylynn  has put up one post on her blog about the workshop and will no doubt post more when she gets her computer up and running.
These two photos were taken into the mirror and you can see the demo paintings. These are some good starts that I’ll be finishing up and posting.
Below is none other than “yours truly”. Wow, there is a reason I hate to have my photo taken! For some reason my hair refused to cooperate either day – isn’t that always the way! I’m blaming it on the weather!
Here are the fine folks who braved the elements to come and learn.

Thursday, February 4, 2010

CORNY 5 - FINISHED?????


This is definitely the most intricate painting I’ve ever done (way more than my lace, but probably less than Rhonda’s “Stranded”) – and I did really enjoy painting it!  And, believe it or not – NO MISKIT. Zero, zilch, nada!

For all of you who want to know how long it took – several hours over several days to get it all drawn out and ready for paint. Then poured and dried at least twice. Then painted over several weeks, some small sections, some larger, as long as I had patience that day!  And I did add a few small touches of acrylic here and there at the end.  I think it's done.

Does it look like corn to you, or just an abstract??? I think it might be one of those paintings that you look at a while and then all of a sudden you realize what it is you are looking at.

Corny, ½ sheet, Fabriano Artistico 140, w/c and acrylic

Tuesday, January 19, 2010

CORNY

I have wanted to paint corn for years and never have been able to get what I wanted. This year I took more photos with the digital camera and finally seem to have gotten the hang of it - although I’m not sure what my neighbors thought when they saw me “up close and personal” with the local corn stalks! Perhaps they thought I was a “stalker”!!
Anyway – as you can see, this is a heck of a lot of lines!

The first step was to enlarge the photo and trace it to the paper with Saral. Then the painting was taped down to a plastic board – which I love! – purchased at either Jerry’s or ASW.


Even though there were lines traced on my watercolor paper, they had to make sense to me, so I found it best to utilize a viewfinder which I made (upper left side of photo) to go over the photo (like a grid). I carefully checked out the lines which had been traced – some lines were erased, some added – until I felt comfortable with the image. This was a process! I could only do a small area, about a half hour at a time, so it took several hours over the course of a few days. Then I let it sit upright on my drawing table so I could check it out periodically. When I was finally convinced it looked like corn (!) to me, I began the painting process.

PS:  I'll be out of town a few days and won't post again until next week - I know you will miss me!  I will try to check in from time to time, tho (gotta get my "blog fix"!)
TIP! When I use Saral, sometimes I get a lot of graphite on the paper - if I leave it on the paper it will mix in with the paint and make it look gray-ish. My solution is, after retracing all lines with a pencil, to put my paper in the stationery tub and use a sprayer - that extra graphite goes down the drain before I begin painting.  This also gives me a wet surface to begin pouring or dripping paint - then I let it sit overnight to dry and all the "peaks and valleys" flatten out, leaving a relatively smooth surface (my own version of stretching paper).

Sunday, January 17, 2010

DEARBORN COUNTY REGISTER NEWSPAPER ARTICLE

I was pleased to see a feature newspaper article about me that ran in our local paper. You can click on the link here or on my sidebar if you are interested in reading it!

http://thedcregister.com/index.php?option=com_content&task=view&id=4182&Itemid=106

A correction would be that I was in the Georgia Watercolor Society Member's Show and the Richeson International Still Life & Floral last year.

Friday, January 15, 2010

BLUE PITCHER AND PEARS ON LACE - PART 5

Then I darkened more of the pitcher reflection and shadows, and went over the background again.
I consider it finished! How about you?

P.S.  My husband told me that I do not give him enough credit for his critiquing expertise - and that I must tell all of you that it is due to his great critiquing skills that this painting turned out well, since he told me to darken the reflection on the pitcher - and that I (the artist) am "merely the paintbrush in the hand of the critic." 
Any comments on this????

Tuesday, January 12, 2010

BLUE PITCHER AND PEARS ON LACE - PART 4

That pitcher was SOOOOOOOOOOOOO blue - had to “dumb down” the blue and darken the shadow side – and hoped I didn’t ruin it.
I also began the background – my “nebulous” background, as I call all/most of my backgrounds.